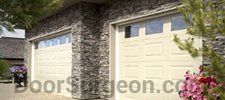
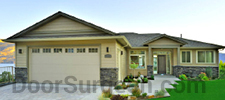
Door Surgeon Residential Home Garage Door Opener Repair Spruce Grove
Mobile garage door opener repair & garage door closer repair & adjustment service.
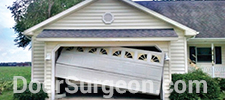
Door Surgeon garage door opener repair, fix, and garage door opener replacement. Call the Door Surgeon garage door opener repair dispatch centre and book garage door opener repair. Door Surgeon's mobile garage door opener repair serviceman has a replacement garage door opener motor, garage door motor parts and garage door remotes in his truck inventory. Our garage door opener repair service can help you resolve your residential home garage door opener repair problem quickly.
Your days are filled with work and typical life challenges. Door Surgeon's garage door opener repair job coordinator can book a day and time to work on your broken garage door opener that better matches your available appointment time requirements. We are more than happy to work with you in scheduling non-emergency garage door opener replacement work. After an appointment is made Door Surgeon's garage door opener repair mobile service will call you twenty minutes to half an hour before he is to arrive at your home.
Door Surgeon stocks replacement garage door openers that are made to last. Door Surgeon's team of mobile garage door service handymen come to your site to repair or replace garage door openers.
Whether you are looking for a garage door opener repair or garage door opener replacement, Door Surgeon's mobile garage door motor repair service and garage door installation handymen can quickly and professionally meet your needs.
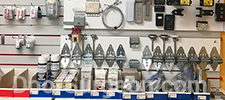
Door Surgeon can repair or replace garage door openers brands such as: Sears Craftsman garage door opener motor and remotes. Allister garage door opener motor and remotes - All-O-Matic garage door opener motor and remotes. Chamberlain garage door opener motor and remotes - Liftmaster garage door opener motor and remotes. Steel Craft garage door opener motor and remotes - Genie garage door opener motor and remotes. Python garage door opener motor and remotes - Python 2 garage door opener motor and remotes. Phantom garage door opener motor and remotes - Overhead Door Co. garage door opener motor and remotes. Sommer garage door opener motor and remotes - Marantec garage door opener motor and remotes. Linear garage door opener motor and remotes - Aztec garage door opener motor and remotes. Stanley garage door opener motor and remotes - Lynx garage door opener motor and remotes.
As well as: Home Hardware garage door opener motor and remotes - Mastercraft garage door opener motor and remotes. Ryobi garage door opener motor and remotes - Hormann garage door opener motor and remotes. Wayne Dalton garage door opener motor and remotes - I-Drive garage door opener motor and remotes. Quantum garage door opener motor and remotes - Merlin garage door opener motor and remotes. Raynor garage door opener motor and remotes - ATOMS garage door opener motor and remotes. Legacy garage door opener motor and remotes - Guardian garage door opener motor and remotes.
And: Home Link garage door opener motor and remotes - Gogo Gate garage door opener motor and remotes. Aladdin garage door opener motor and remotes - Mighty Mule garage door opener motor and remotes. Skylink garage door opener motor and remotes - Motor Lift garage door opener motor and remotes. Intellicode garage door opener motor and remotes - Code Dodger garage door opener motor and remotes. Screw Drive garage door opener motor and remotes - Belt Drive garage door opener motor and remotes. Chain Drive garage door opener motor and remotes - Direct Drive garage door opener motor and remotes. Trolley garage door opener motor and remotes.
While Door Surgeon's mobile garage door repair service can repair, fix and adjust a large variety of garage door opener motors Door Surgeon also has quality replacement brands available to replace older garage door openers.
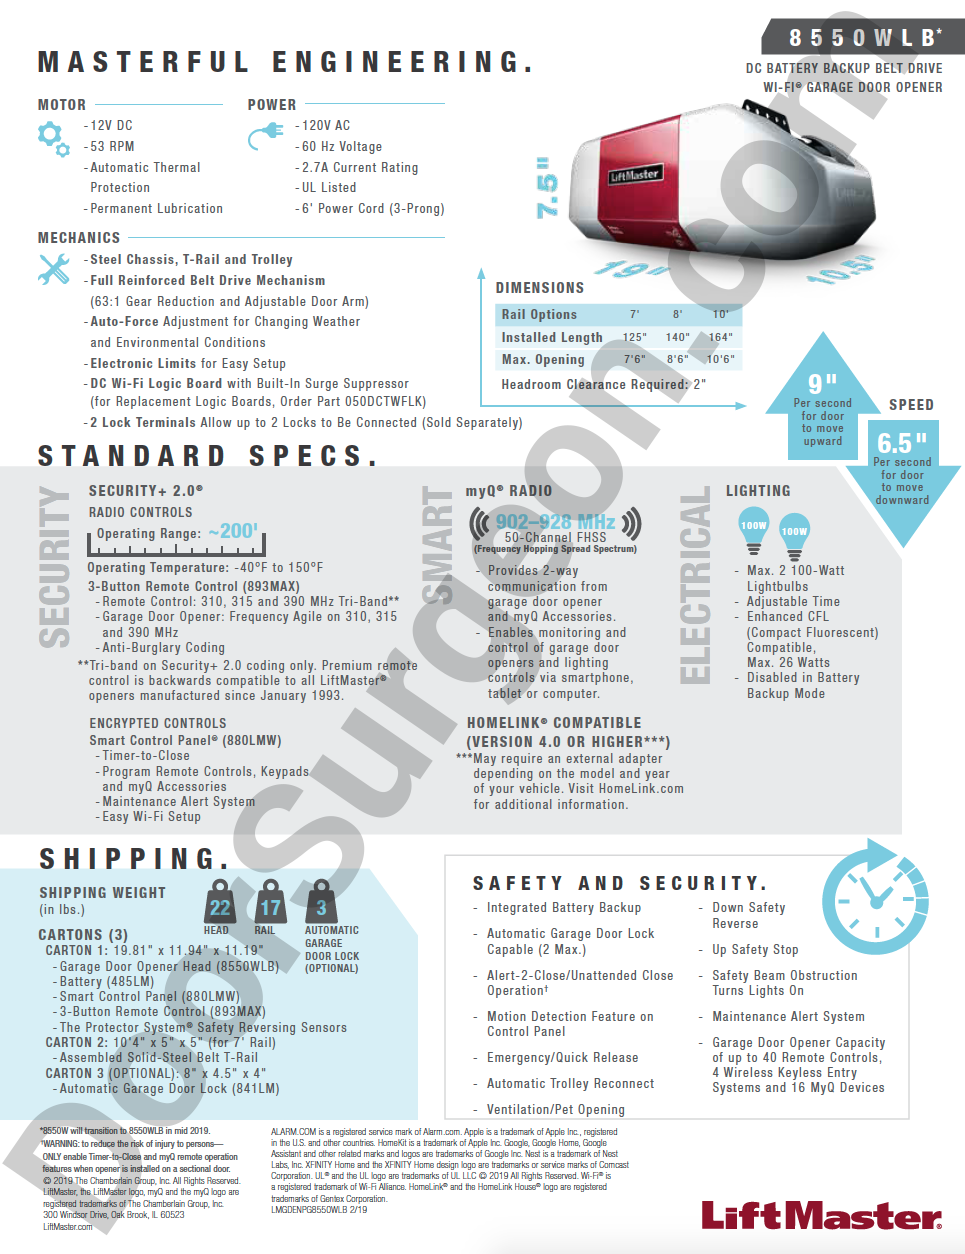
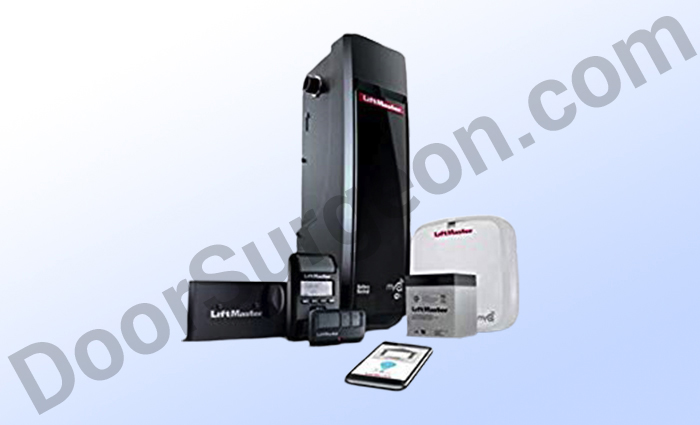
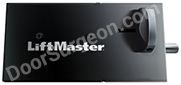
Spruce Grove LiftMaster Series 8550w DC Battery Backup Wireless Garage Door Opener Feature rich, offering ultimate garage protection
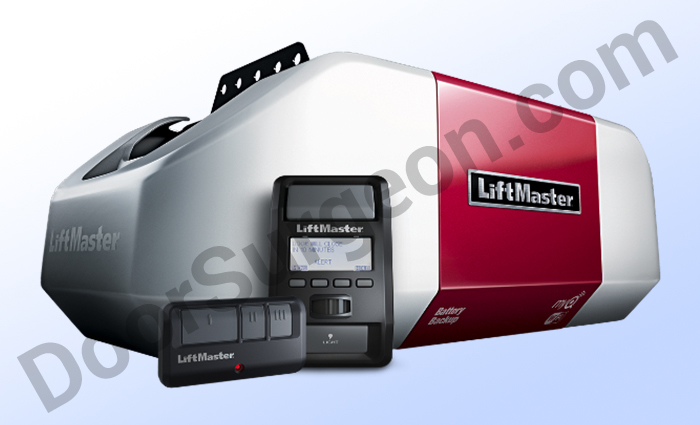
For Spruce Grove home owners who want both quiet and smooth-running reliability this garage door motor is the quietest LiftMaster has to offer. Door Surgeon's mobile service installation team provides new LiftMaster garage door openers.
LiftMaster 8550w garage door opener, automatic garage door lock capable, deadbolt locks the garage door making it virtually impenetrable (2 MAX., Sold separately), installed by Door Surgeon's professional team of mobile garage door opener handymen. The belt drive system and quiet DC motor provide smooth operation and long-lasting service. Integrated battery backup ensures garage access even when the power's out. Built-in Wi-Fi for the easiest way to connect the garage. MyQ Mobile App lets the users receive alerts and control the opener from anywhere.
Call Door Surgeon's mobile garage door opener repair dispatch centre to book your installation today.
Safe & Secure Operation
All of Door Surgeon's garage door openers are manufactured with the highest level of safety and monitoring systems to ensure safe operation.
- Automatic garage door lock capable: Deadbolt locks the garage door, making it virtually impenetrable (2 MAX., sold separately).
- Timer to close garage door motor can be programmed to close the door after a set amount of time.
- Security + 2.0® Sends a new code with every garage door opener remote click.
- Posilock® electronically protects against forced garage door openings.
- Alert-2-Close signals when a garage door is being closed by MyQ.
- The Protector System® invisible light beam auto-reverses the garage door if there is an obstruction.
- Motion Detector on garage door motor lights the way automatically.
Powerful Add-ons:
841LM: Automatic Door Lock Capable Deadbolts the garage door automatically every time it closes
825LM: Remote Light Control Plug any lamp to this device to control it with the smartphone or garage remote.
374UT: Mini Universal Remote Control Compact and portable to provide quick, easy garage access.
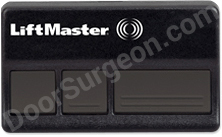
893LM 3 Button Garage Door Remote Control
- Directional visor clip included.
- Operates up to 3 openers
- Operates MyQ Light Accessories
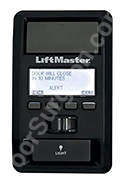
880LMW Smart Wireless Control Panel
- LCD display
- Intuitive menu-driven panel lets you easily program remote controls, adjust settings, and even get system diagnostics.
- Motion-detecting control panel turns on the opener's lights.
877MAX Wireless Keyless Entry with Security+
- Wireless Design, no need for additional wiring.
- Keyless access, open or close your garage door without using a remote control or key.
- Holds 4 unique PIN codes
- Easily syncs to your existing opener's frequency
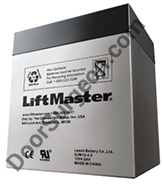
485LM DC Battery Backup
- Provides power to the opener when power is out so your garage door can still be opened and closed with all devices.
- Fast and Easy battery replacement.
- Works on all LiftMaster integrated battery backup garage door openers.
8550w Standard Specifications
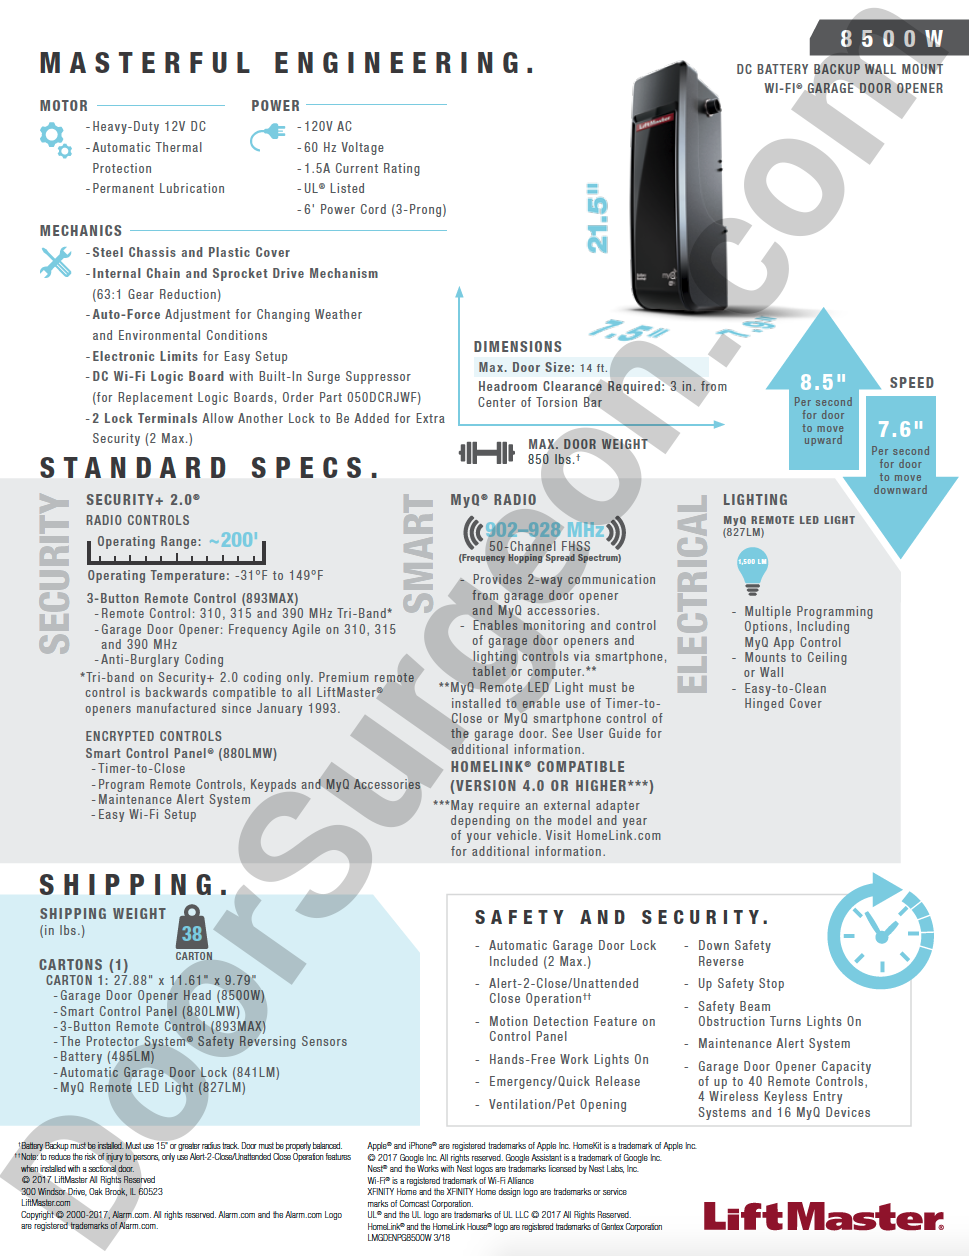
LiftMaster Series 8500w DC Battery Backup Wall Mount Wireless Garage Door Opener Spruce Grove The Ultimate garage access solution, designed to optimize space.
The Spruce Grove LiftMaster 8500w DC Battery Backup Wall Mounted Wireless garage door opener, installed by Door Surgeon's mobile team of garage door opener technicians, has quiet DC motor that eliminates noise and vibrations through the ceiling and provides smooth operation. Heavy lifting power, operates doors up to 850lbs. Integrated battery backup ensures access even when the power is out. Manufacturers lifetime motor warranty, 5yr parts, 1yr battery and accessories. Built-in Wi-Fi for the easiest way to connect the garage. MyQ Mobile App lets the users receive alerts and control the opener from anywhere.
Safe & Secure Operation
- Space saving design opens up the ceiling.
- MyQ remote LED light provides bright, maintenance-free illumination.
- Included automatic garage door lock makes the garage door virtually impenetrable.
- Security + 2.0® Sends a new code with every remote click.
- Motion Detector automatically turns on lights.
- The Protector System® invisible light beam auto-reverses the door if there is an obstruction.
- Timer-to-close automatically closes the door after a preset amount of time.
Powerful Add-ons:
374UT: Mini Universal Remote Control Compact and portable to provide quick, easy garage access.
893LM 3 Button Garage Door Remote Control
- Directional visor clip included.
- Operates up to 3 openers
- Operates MyQ Light Accessories
880LMW Smart Wireless Control Panel
- LCD display
- Menu-driven panel lets you easily program remote controls, adjust settings, and even get system diagnostics.
- Motion-detecting control panel turns on the opener's lights.
877MAX Wireless Keyless Entry with Security+
- Wireless Design, no need for additional wiring.
- Keyless access, open or close your garage door without using a remote control or key.
- Holds 4 unique PIN codes
- Easily syncs to your existing opener's frequency
485LM DC Battery Backup
- Provides power to opener for when power is out so your garage door can still be opened and closed with all devices.
- Fast and Easy battery replacement.
- Works on all LiftMaster integrated battery backup garage door openers.
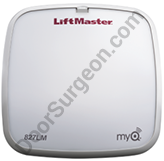
827LM MyQ Remote LED Light
- Operates automatically with the opener and works with the MyQ App.
841LM Automatic Garage Door Lock
- Deadbolts the garage door automatically every time it closes.
8500w Standard Specifications
Follow these links for related pages
Garage Door
Service
Spruce Grove
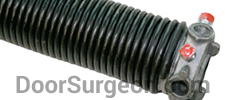
Broken Spring Replacements
Spruce Grove
Home Garage
Door Repair Service Spruce Grove
Garage Door Parts Spruce Grove
New Residential Garage Doors Spruce Grove
Door Surgeon Residential Home Garage Door Opener Motor Servicing Spruce Grove
Mobile Garage Door Parts & Service Spruce Grove
Door Surgeon Sales & Service Parts Centre Edmonton
Click the link to find a location or service provider nearest you:
JJ - Door Surgeon's Operations Manager: Door Surgeon Residential Home Garage Door Opener Repair Serviceman
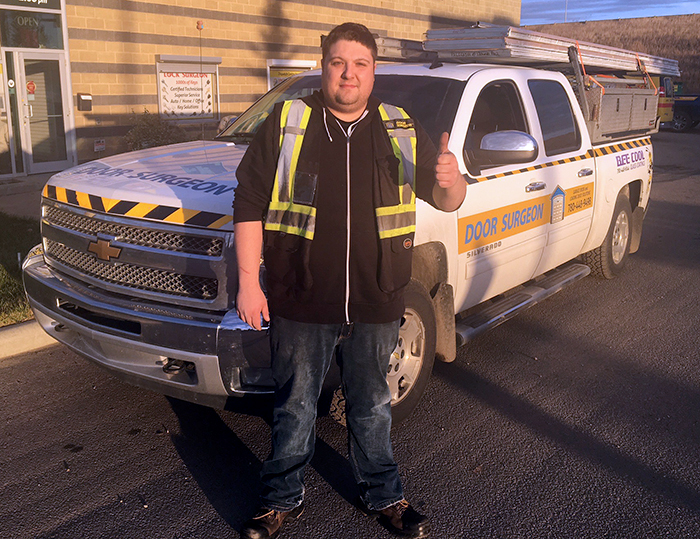
JJ started with Door Surgeon in 2008 and has worked reliably. He came to Door Surgeon with a variety of overhead garage door installation skills and grew his abilities by taking on new challenges in commercial overhead garage door opener repairs. JJ is the go to man for all that is commercial overhead garage doors opener repair, whether it's new overhead garage doors openers, parts for overhead garage doors or overhead garage door repairs
While JJ does spend a small amount of time in the shop helping customers, supervising and training his crew and providing budget quotes he also spends a good deal of time out in the field renovating and repairing commercial overhead garage door openers. Often JJ has been the expert to correct other's problems and or rebuild an entire face of a commercial overhead garage door so that the new door will work properly and safely when installed.
Garage Door Opener Concerns and Installation - 5 min
Video Script
As recently as 10 to 15 years ago a residential garage door opener was considered to be a luxury, today most home owners consider them to be an essential garage door item. Garage door openers are virtually everywhere. For this reason it is necessary for the professional garage door installer to understand the steps to proper opener installation. Over then next few minutes we'll take a look at the residential garage door opener, it's safety features and correct installation procedures. Let's get started.
Understanding UL 325 and preparing the job site - Underwriter laboratories is a non-profit organization that specializes in the development of standards for many different products. The standard that applies to door opening systems is Ul 325. In its earliest stages openers were tested by UL as electric motors but in 1973 UL recognized that openers were more than just motors and required that if a motor contacted an obstruction within 2" of the floor, that it automatically reverse within two seconds. In 1982 a second reversal feature was added to UL 325 stating that the opener must automatically reverse the door to its open position, if the close limit was not reached within 30 seconds. In 1993 UL 325 was again revised to include another feature: external entrapment protection devices, such as photo detectors and safety edges, are required.
Whether or not you installed the door there are some things to consider when evaluating the site conditions. First in order for the safety features to work correctly and the life of the opener to be maximized the door opening must be properly constructed and the door opener must be properly installed. Understand what type of door you will be attaching an opener to, the opener installation will be different for different door types.
Openers - there are 4 types of openers they are: Chain type, screw type, belt type and direct drive. The chain, screw and belt types are all installed in similar fashion and will be covered in this training video. The direct drive type requires specific manufacturers instructions. Determine if there are any gaps between the floor and the door, gaps across the top of the floor might cause the automatic reversal feature to operate incorrectly. Make sure there is an electrical outlet close to the opener, if there isn't one remember that electrical codes may require that a licensed electrician perform any wiring required. Some electrical code may even require wiring the power source through conduit. Most important, never use an extension cord as a method of providing power.
Installing the opener - Before we begin its important to mention that installation procedures vary from garage to garage, low ceiling or finished or not finished ceilings all come into play when installing an opener, with that in mind today we'll address common ceiling heights for finished or un-finished garage ceilings. With the door at it's high-rise point, the point where the top edge of the door is highest above the floor, measure the distance from the top of the door to the ceiling, then close the door and at the centre of the header make a mark 2" above the high-rise point you just measured. Now mark the bracket, pilot drill the holes and attach the bracket to the header. Once again open the door, place a 1x4 board on top of the door section, centre the opener and rest it atop the 1x4 this gives you the correct clearance for operating the door.
At this time you'll also want to connect the opener rail to the header bracket, too do this you'll need to reach between the bottom of the door and garage header. Fasten angle-iron to the two closest joists above the opener, then cut and fasten angle brackets from the ceiling angle-iron to the opener, always use locking nuts or washers as provided by the manufacturer. Now, close the door and attach the opener arm assembly. Be sure to position the trolley so that it's about 2" back from vertical. Next attach the emergency release cord, the cord should hang about 6' above the garage floor. Now manually open and close the door to ensure smooth operation.
Next assemble and mount the IR safety system so that the sensors are between 4" and 6" above the floor, checking with the manufacturers instructions for exact mounting procedures. Run the low voltage wires back to the motor assembly in a neat fashion, make sure to use insulated staples, metal staples can short the wires and the opener will not operate properly. At this time you can also connect the wall control station. Make sure the wall station is mounted 5' from the floor so that children can not play with it. Also, ensure the control is mounted within line of site with the floor and finally plug in the opener to the ceiling plug.
Opener Adjustments - Now that the opener is installed we can adjust the settings and up and down travel limits, obviously different manufacturers have different adjustment methods so be sure to refer to the manufacturers instructions for specifics. With that said here are some basic guidelines: Set the up and down force to minimum activate the opener to open and close the garage door stops during the up and down travel the up or down sensitivity setting will need to be adjusted according to the manufacturers instructions. The opener is adjusted correctly when the garage door can travel to the fully open or fully closed position without encountering any difficulties. Now let’s look at travel limits.
The limit adjustments control how far the garage door will open or close up. travel should be set so that the bottom edge of the door is no lower than the bottom edge of the garage door header and no higher than 2" above the bottom edge of the header. Down travel should be set so that the door closes gently in the closed position. If the door stops and reverses upon hitting the floor or stops before hitting the floor the down travel limiter will need to be adjusted as per the manufacturers instructions. Our next step is to check for proper operations of the safety reversal features, we'll begin with door force.
The door force mechanism must be in proper adjustment at all times. This ensures that the garage door will reverse its motion if it encounters any obstruction on its downward travel and stop its motion if an obstruction is encountered on its upward travel. With the door open lay a 2x4 or similar obstacle flat in the centre of the garage door opening, when the door hits the obstacle it should reverse and go in the opposite direction. If the door does not reverse after hitting the obstacle then the downward travel must be adjusted.
Now, let’s verify the IR reversal function. Place an obstacle in the path of the IR beam, if the opener will not activate at this time, the IR system is working correctly. Openers have one other IR safety feature, if the IR system is not functioning the homeowner can close the door by pressing and holding the closing button on the wall station, but here's the catch... if the door does not reach its' fully closed position while the button is pushed the door will automatically open as soon as the button is released. Keep in mind this constant pressure override system can not be triggered from the remote openers, only from the wall station.
Finishing the Installation - Okay, here are a few final simple tasks you'll need to do to finalize your installation. Install the opener lightbulbs, making sure the bulbs have a wattage equal to or lesser than recommended by the manufacturer. Apply the warning labels, each opener is provided with one or more labels to warn or instruct homeowners in the safe operation and regular testing of the opener. These must be installed according to the manufacturers instructions. You must be sure to affix a label by the wall mount button, this is a required label and is not subjective to the customers preference. If a customer asks you not to apply the label by the wall button explain that it is a safety requirement and you must put it there.
Next help the customer program the remote controls, each manufacturer has different programming sequences so refer to the manufacturers manual for specific instructions or details. Finally be sure to review the main operation and safety features of the door opening system with the homeowner, including the manual release, wall control, IR System and safety labels, discuss the warranty and leave the homeowner the installation manual. You've now completed the installation of your customers new garage door and opener, but remember the example we've shown you is a typical installation and not all of your assignments will follow this process so the most valuable tool in your ongoing training is the manufacturers instructions.
WARRANTY
Sometimes Things Happen
No one likes it when things go wrong, no one more than us, but if it does check out our Warranty

Affiliates & Memberships